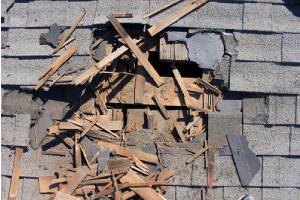
 More than 70 percent of all single-family homes in the United States have roofs with asphalt shingles. While asphalt shingles have an average lifespan of 15 to 30 years, they can begin developing problems as they nudge closer to the end of their life expectancy. If you notice that your shingles are missing, broken, or damaged, you may be concerned about the need for roof replacement. However, full roof replacement is not always necessary.
How to Remove Roof Shingles
Learn how to remove roof shingles and what red flags to look for that could indicate the need for a roof replacement.
1. Choose a Start Date
Choosing a designated day to start the shingle removal is important for several reasons. First, you want to choose a day when the weather is expected to be nice and not rainy or stormy. You also want to choose a day that you know you will have time to get the project completed. You do not want to leave your roof half shingled for an extended period of time. Finally, you want to have not only time to remove the shingles, but also to lay a new layer of shingles. Leaving your roof bare can lead to damage.
2. Gather Permits, Tools & Materials
Depending on where you reside, you may need to acquire a permit before you can begin removing and replacing shingles. Talk with your city office about your plans to determine if a permit is needed. Next, you will want to rent a dumpster to dispose of the old shingles and save your yard from a massive mess. Before starting the project, assemble all the tools and materials you will need to prevent delays. This may include a sturdy ladder, hammers, nails, pry bar, adjustable roof jacks, tarps, and plywood sheets to lean against the roof jacks.
3. Prepare Your Property
 Take the time to safeguard your property from damage before you begin removing roof shingles. Loose shingles and nails may miss the dumpster and land in your yard. To prevent damage, place a sheet of plywood over your air conditioner. Tarps can be used to cover swimming pools, hot tubs, and landscaping. You can prevent shingles from sliding off of your roof by setting up roof jacks around the perimeter of your roof. Use the sheets of plywood to form a protective barrier that catches any sliding shingles.
4. Strip the Roof
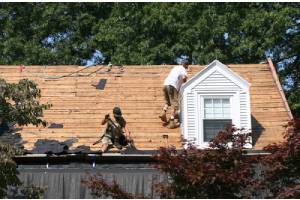
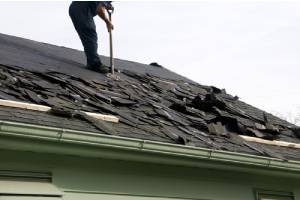
Starting at the peak of the roof, begin stripping it of shingles. While a garden fork can be used to loosen the shingles, some homeowners may prefer a notched roofing tear-off shovel. Garden forks are often a preferred option as they are highly efficient at removing shingles without getting caught on nails. Once you have loosened the shingles, allow them to slide down the slope of the roof to the roof jacks. Alternatively, you can pick up the shingles and throw them off of the roof into the dumpster.
5. Evaluate Roofing Flashing
As you continue moving removing shingles in two to three foot sections, pay attention to the flashing. The flashing should be free of rust and cracks. If you find damage, consider replacing the flashing with new. If the flashing is in good condition, remove the nails holding it in place and gently pry it up to remove the shingles underneath. It is important to remember that flashing generally has the same lifespan as shingles. Therefore, if the flashing was installed at the same time as the old shingles, it may be time to replace the flashing too.
6. Remove the Roof Jacks
 Once you have removed the shingles from the majority of the roof, move towards the edge of the roof. This is the time to remove the roof jacks and plywood, allowing you the ability to pull up the remaining shingles. Instead of completely prying up these shingles, simply loosen them to prevent the shingles from sliding off the roof. Once loosened, pull off the shingles with your hands and throw them into the dumpster. During the roof shingle removal process, it is a good idea to wear a harness in case you slip and fall.
7. Clean Up the Roof
After all of the shingles have been removed from the roof, go over the entire surface to check for protruding nails or signs of damage. If you notice any damaged components, such as sheathing, have these materials replaced before applying a new layer of shingles. Using a push broom, sweep the roof off to create a clean surface for the new shingles. If you do not plan on putting the new shingles on the same day, lay down a tarp to protect your roof until the new shingles can be installed.
8. Lay Down New Shingles
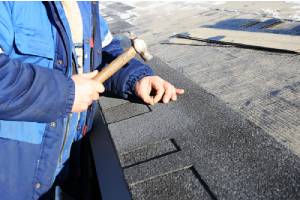
Before new shingles can be installed, you will need to install ice and water barriers, as well as a layer of felt. When you install shingles, always work from the bottom up, starting first at the eaves. New flashing can be installed at the joints and valleys to prevent leaks. No matter what type of shingle you choose, the process is relatively the same. After laying down your starter shingles, you will want to overlap the shingles as you work your way across and up the roof. Finish up the roof by installing the hip and ridge capping.
Contact A Roof Replacement Contractor
 Even if you do a good job at maintaining your roof, you may find that the damage is severe as you remove the shingles. If this happens, you will want to consider a full roof replacement. There are a number of red flags that could indicate the need for roof replacement, such as cracked, curled, or missing shingles, sagging rafters, shingle granules in the gutters, or peeling or blistering paint. If you suspect damage, call in the professionals for a more thorough investigation. To learn more about how to remove roof shingles or for a free roof replacement consultation, contact Beyond Exteriors.