 Whether you plan on tackling a roofing job on your own, or simply want to estimate the cost to hire a professional, knowing how to measure a roof can come in handy. Unless your roof is completely square, flat, and without protrusions, measuring your roof is not as easy as multiplying the length times the width. To determine the square footage, you will need to take several measurements and develop a rough diagram that breaks up the roof into smaller sections. To properly measure a roof, you will need to find the length and width of each individual plane, then multiple the length times the width to find the total square footage.
Steps to Safely Measure Your Roof
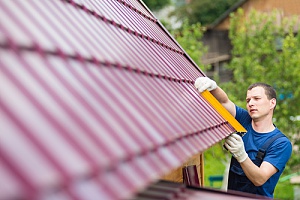
1. Gather Your Supplies
Before climbing onto your roof, gather a few essential supplies to make the measuring process easier. You will need a tape measure and a notepad and pencil to record your measurements. You will also need a sturdy ladder to climb onto your roof. Ensure that the ladder is flat on the ground and stable before you start to climb. If possible, have someone hold the ladder from the ground as you climb up and down to increase safety.
2. Calculate the Square Footage of Each Section
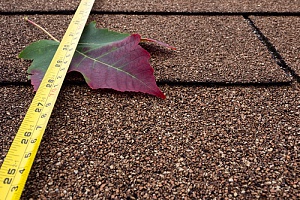
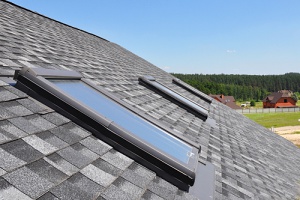
The next step involves calculating each section of the roof individually. For flat sections of the roof, record the length and width. For sloped sections of the roof, measure the dimensions of each individual plane. A “plane” is a flat, continuous section of the roof.
For each plane, you will want to multiply the width by the length to determine the square footage of that section. When calculating the square of every plane, be sure to document any protrusions, such as skylights, chimneys, and other obstructions. Dormers should also be included in your measurements.
When recording your measurements, make sure that your recordings are accurate. Do not round your measurements up or down as this can throw off your estimate and possibly cause you to purchase fewer materials than you actually need. Always write down the exact measurements seen on the tape measure.
3. Determine the Pitch of the Roof Deck
 The next step involves measuring the pitch or slope of the roof deck. The roof pitch is determined using the common formula rise over run. In this instance, you will need to determine the vertical distance (rise) over a 12-inch horizontal segment (run). Record the vertical measurement first, followed by the horizontal measurement.
4. Calculate the Number of Squares on the Roof
A “square” on a roof is any area that measures 100 square feet. After determining the square footage of each plane on the roof, you will want to determine the number of squares, which are the units commonly used for roof measurements.
Calculating the number of squares on a roof is simple. Just divide the total square footage of the roof by 100 to get your answer. With this number, you can estimate how much roofing material you will need for the project.
5. Sketch a Basic Diagram
While not necessary, it can be helpful to create a visual diagram of your roof. Start by sketching the shape of your roof, including important details like dormers, valleys, hips, and ridge lines. You can also add in protrusions like chimneys and skylights to make the sections of roof easily identifiable.
Using the calculated measurements for each section of roof, mark down the length and width of each plane, along with the square footage of each section. Ideally, you want your sketch to show your roof broken down into simple geometrical shapes which can make it easier to complete your calculations.
Measuring a Roof from the Ground
If you do not feel comfortable climbing onto your roof to take measurements, you can calculate the square footage from the ground. However, know that your measurements will be an estimate and less precise than a on-the-roof measurement. Measuring from the ground usually only works for square or rectangular roofs. If you have an irregular-shaped roof, you will need to measure from the top.
 To measure your roof from the ground, use your tape measure to find the length and the width of the home by stretching the tape measure along the exterior walls. If your roof has overhangs, eyeball them and add the approximate length to your measurements.
To estimate the pitch of the roof, go into your attic equipped with a tape measure, pencil, and 18- or 24-inch level. Start by measuring 12 inches from one end of the level and make a mark. Once in the attic, place the level against the bottom of a roof rafter.
Measure vertically from the 12-inch mark to the underside of a rafter. That measurement is the number of inches that your roof rises in 12 inches.
Once you have determined the estimated square footage of your roof, you can proceed in the same way as the first method. This involves dividing your estimate square footage by 100 to determine the amount of materials you will need for your roofing project.
When purchasing materials for your roof, it is a good idea to always buy at least 10 percent more materials than you think you will need to prevent coming up short. Remember, you can always return the materials you do not use to the store.
Schedule a Free Roof Evaluation
Measuring the area of your roof is not always a simple process. In fact, it can be challenging to determine the square footage, especially if you have an irregular-shaped roof or if your roof has multiple dormers, valleys, hips, and ridge lines. However, getting a precise measurement is crucial if you want to purchase the correct amount of materials. If you are not confident in your ability to get a precise measurement, or if you do not feel comfortable going on your roof, consider hiring a professional to make the measurements and calculations for you. Contact the roof replacement contractors at Beyond Exteriors to schedule a free roof evaluation.